A Guide to Model Photography
Updated: Apr 4
Creating a high-quality "Live Show" look at home requires a blend of the right equipment and a refined technique. This guide outlines how to build an indoor studio to showcase your models with clarity and realism.
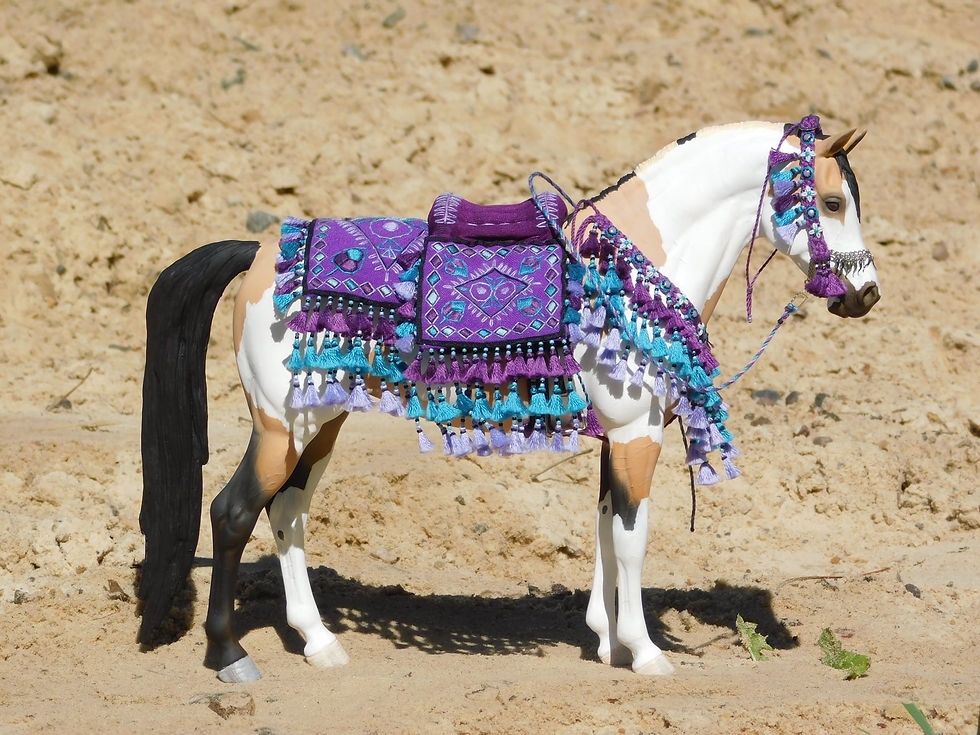
Photo Credit: Katrina J.
Table & Backgrounds:
The Setup Area
A sturdy, adjustable-height table is ideal. Here is a good product recommendation: https://amzn.to/4sZzhW1
Background Options
Seamless Look: Poster boards, Kraft paper, or paper for drawings are excellent for clean, distraction-free shots, they are inexpensive at your local HobbyLobby and are flexible. Tan or grey are great universal options for most model colors. But being so cost effective, you can have many color options to play around with! Just avoid anything bright or distracting.
If you prefer delivery instead of shopping, here are some options. More permanent: https://amzn.to/4sZzhW1 - More cost effective: https://amzn.to/3YUjt9l - But poster boards and art paper are usually around $3 each at HobbyLobby.
Realistic Options: Consider to-scale realistic backgrounds (such as an arena or trail). You can hand-craft these using scale-appropriate materials, or use high-resolution Matte Photo Backdrops depicting realistic trails or show rings. These can be printed at a local UPS or other poster printing location, alternatively sometimes you can find these backdrops for sale online. This is a great way to upgrade your photos, especially for Performance where backgrounds are heavily judged.
Lighting Equipment & Configuration:
A controlled lighting environment is the secret to high-quality entries. While natural light is wonderful, and debatably the best, a dedicated studio setup provides consistency year-round.
The Three-Point Setup
For a balanced look, we recommend a three-point lighting system. However the overhead light is optional, you can get away with only two side lights but the three-point lighting setup will give the best results.
Overhead Light: Use a Boom Stand or C-Stand with an adjustable arm. This allows the light to hang directly over the center of the setup to eliminate harsh shadows. Product recommendation: https://amzn.to/3O1OJ3M (Includes all three lights)
Side Lights: Two adjustable Standing LED Panels should be placed on both sides of the table, positioned slightly in front/behind of the model to fill in details. Product recommendation if you desire to do just side lights: https://amzn.to/4bAYBLZ
Recommended Settings
Color Temperature: We suggest a setting of 5000K (Daylight) for true color representation.
Brightness: Start with your side lights around 50-75% and your overhead light around 25%.
Managing Reflections: If you are shooting glossy models, try facing your lights towards a white ceiling or wall rather than pointing it directly at the model. This softens the light and minimizes distracting "hot spots."
Camera & Technical Settings:
While modern smartphones are fully capable, a traditional camera offers the manual control needed for professional results.
Hardware
The Camera: An entry-level to mid-range DSLR or Mirrorless Body is perfect for this hobby. Product recommendation: https://amzn.to/49DGzXU (If this is out of your budget, you can consider a used or refurbished camera. Or use your phone’s camera!)
The Lens: A lens with a focal length of 35mm to 50mm typically avoids the "distortion" that can make a model’s proportions look incorrect.
Stability: Use a Sturdy Tripod to ensure your images are crisp and blur-free. Product recommendation: https://amzn.to/49Wc66c
Suggested Manual Settings
Aperture (Depth of Field): Use Aperture Priority Mode (Av). An aperture of f/8.0 to f/14 offers a nice balance.
ISO & Image Clarity: For the crispest, most detailed images, aim for an ISO of 100 to 400. Since you are using a tripod and your subject is stationary, you don't need to rely on high ISO settings. This ensures your "digital grain" is non-existent, allowing the judge to see every fine detail of the model's finish. But experiment if you run into issues, don’t be afraid to play with your camera’s settings!
Focusing: Ideally your camera should be focused on the horse’s eye and the center of the barrel, or hip.
Editing:
Editing is a standard part of the process. It is not about "faking" the photo, but about accurately representing the model.
Software: We recommend PaintShop Pro for its robust toolset and user-friendly interface, however there are many other photo editing options out there that are also free.
The Goal: Adjust your Brightness, Exposure, Highlights, and Whites to ensure the photo is bright and clear. It is easier to correct a slightly bright photo than a dark one.
Digital backgrounds or “photoshopping”: Is strictly prohibited in most, if not all shows. To keep the playing field level, we require "raw" photos. You may crop or adjust brightness, but adding digital elements, filters or "painting out" stands/flaws are prohibited.
Same as above, A.I is also not allowed in any capacity in most shows. So do not use A.I to edit your photos.
Remember: Play with your settings! Editing is a skill that improves with experimentation. The goal is a clean, crisp image that looks exactly like the model in your hand.
Other Considerations:
While photography and photo editing are an important part, it doesn’t stop there. Don’t forget minor details that will affect your overall placing.
Dust: Make sure you have a dust-free, flaw-free model to photograph. We recommend using a makeup “mop” brush to remove unwanted dust. Product recommendation: https://amzn.to/3ZAJwT2
Footing: If you are struggling with flat hooves that have gaps underneath them, then perhaps you need footing for your model. Outdoor photos usually fix this, but in a studio you can add sand or even a felt pad as footing to cover this gap. This trick works best with a realistic background, but will also work on a plain background. Kinetic Sand: https://amzn.to/4bdOmNi - it is formable, flexible and looks realistic! Felt pads: https://amzn.to/49WmtqU - get green or tan for grass/sand illusions or match the felt to your background color for a seamless look.
Enjoy the process: Photography is meant to be fun and creative. It is a learning curve that requires patience. If you want to photo show, you will also want to photograph your models! Enjoy the process and don’t rush it 🙂


Comments